Saturday, 3 January 2015

Who Relieves the Relief II - Rematch Force in Force AAR


Dead1 and I recently played a mission where his Aussie relief column had to make it through a village infested with Evil Taliban. However the story that unfolded was a tragic one with the Australian troops mostly being blown up. You can read all about it here.

As is the usual case when Dead1 and I play Force on Force, we generally organise a rematch of a scenario but swap sides. So let us see how things pan out for the Australians this time!

You'll see some new props - terrain I recently got via S&S Models and painted up, including the shot up HiAce, the skips, assorted crates and a shipping container! Great service from S&S Models and most of the items were cast well.

A note about the terrain placement - we replaced the hill near the jingle truck with more buildings. The map on the photos has not been updated to reflect this.


PRE-GAME THOUGHTS BY CAILUS
Dead1's push through the village was slow and this is not a mistake I want to repeat.
Most likely the initial mine strike will see the Bushmaster in flames (unlike our last game where the mine failed dismally). They will need to mash in one of the ASLAVs with haste. If it survives however, I will activate it last and hopefully by then the Taliban have reacted elsewhere or are pinned.

With only eight turns to get all my units to the exit zone, the convoy will need to be on the constant tactical move. I could move the column off the road and around a flank but I won't simply because it's not in the spirit of the mission!
If I lose the initiative in later, my reactions will still focus on moving.
Any fire on the Taliban will be concentrated fire in an attempt to destroy their units in the hope of reaping a few additional VP.

The rest is in the hands of Lady Luck.


AUSTRALIAN FORCE COMPOSITION
Australian forces are well-supplied and have high confidence (TQ D8 / Morale D10)
2xInfantry Sections of an NCO and two three- man fire teams (1x F88 Austeyr, 1x F89 Minimi, 1xF88 GLA)
2xASLAV IFVs
1xBushmaster PMV

TALIBAN FORCE COMPOSITION
All Taliban forces are Local. They have normal supply and have high confidence (TQ D6 / Morale D8)
3 identical groups with a Leader & Group of 9 (1xRPK, 1xRPG, 7xAKs)
1 x Heavy Mortar team with Spotters


FIRST CONTACT
The Taliban set up as described in the scenario and we agreed that they should get the same asset of heavy mortars that they got in the previous game. The only difference was that they didn't get a DsHK Machine Gun team. On further review after the game I think Dead1 may have forgotten to deploy this for whatever reason!

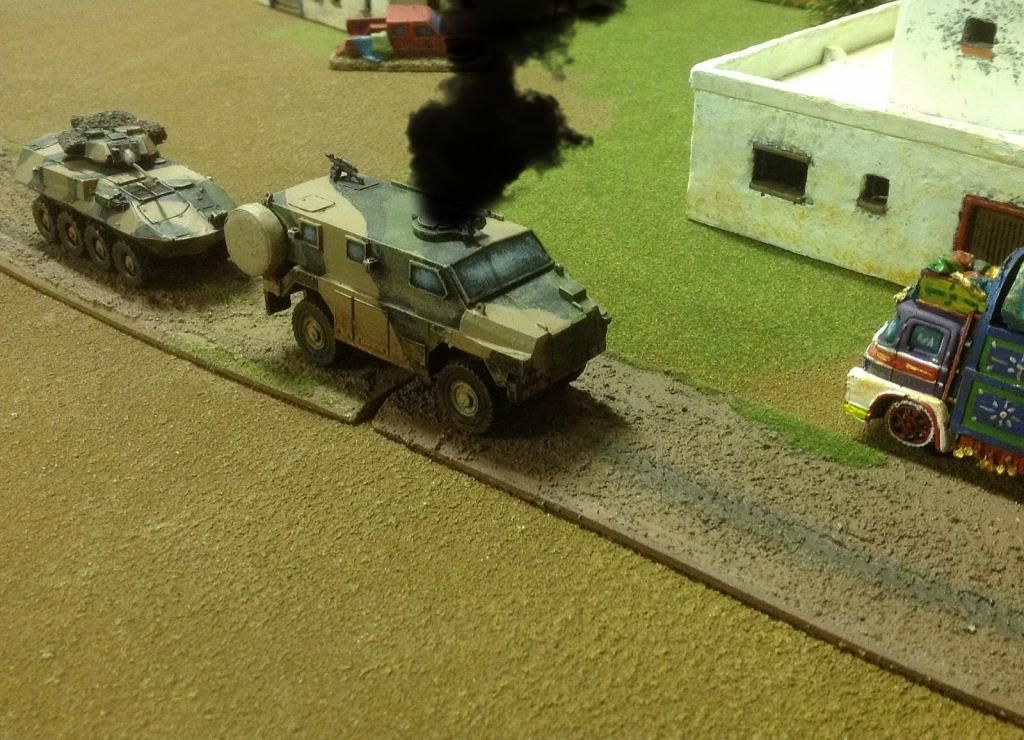
However the free mine strike on the Bushmaster was successful and blew it up before the game even started but thankfully for the Australians, the two crew members survived without any harm.

The Australians started with the initiative.


TURN 1 - THE PUSH
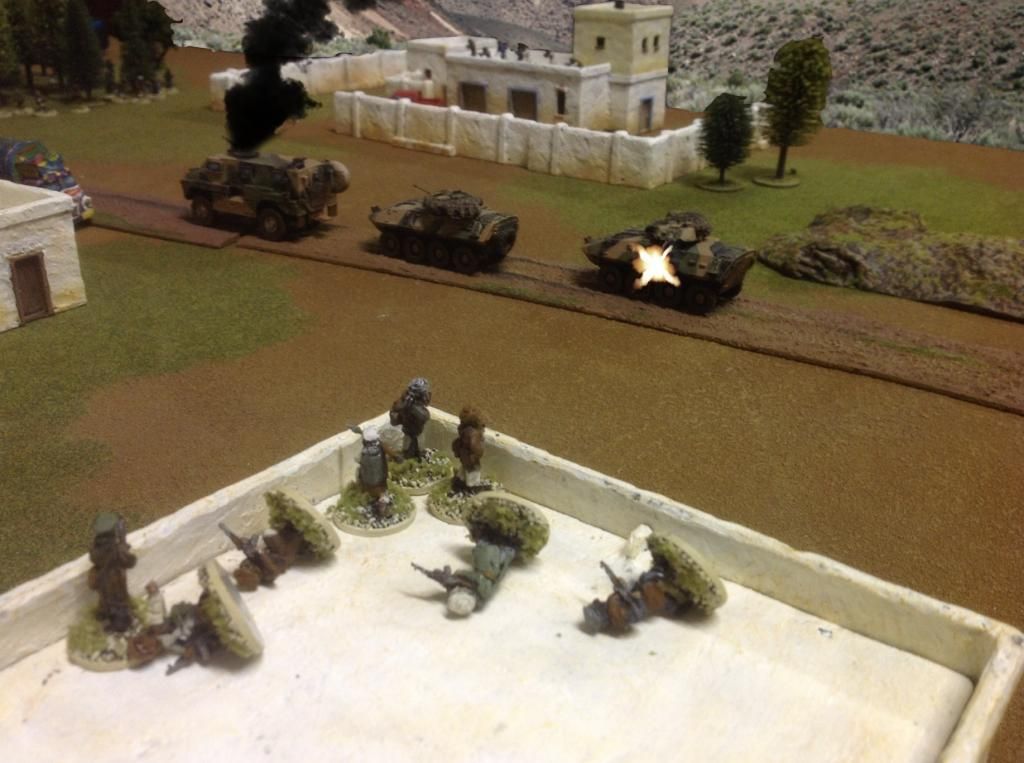
The Bushmaster crew embarked into the rearmost ASLAV 2. Because of this the vehicle would not be able to move but could still provide overwatch. Both ASLAVs concentrated fire on the Taliban team by Hot Spot 4. The insurgents couldn't get into the cover of the Scrap Yard building fast enough and were cut down by the impressive firepower. Only four of the ten remained.

The Taliban by Hot Spot 3 took positions within the Compound. The RPG gunner tried to hit ASLAV 1 but reactive fire by both IFV first caused three casualties. In return, the Taliban with the RPG failed to score a hit.

Elsewhere the mortar spotter advanced into the Spotter's Building, which gave him a good field of vision along the road.

The Taliban near Hot Spot 1 slowly pushed their way through the woods and were reinforced by half a dozen of insurgents.


TURN 2 - A GOLDEN OPPORTUNITY
The Australians sought to continue a constant drive forward, so no units went on overwatch.
ASLAV 1 declared a Move & Fire order with the Taliban in the compound as their target. The Taliban unit decided to react fire but on the subsequent Opposed Reaction Test the Australians won. This meant that the Australians would move and fire first and if any Taliban survived (and passed their Morale Test), they would be able to return fire.
Having rolled a "1" on for the Reaction Test, Dead1 gained a Fog of War card, one he did not need to declare and thus one that could hamper the Australian forces in the future.
The ASLAV's cannon and MG fire was not hugely effective and only caused a couple of casualties. The survivors held their resolve and then Dead1 cackled as he unleashed the Fog of War card he had received moments before - "The Golden BB". This card automatically destroys a vehicle with no rolls required!
ASLAV 1 blew up but as the Australians bailed out of the wrecked vehicle, they were extremely fortunate that only one member of a Fire Team appeared to be wounded! They were however pinned, unsurprisingly.


ASLAV 2 advanced forward reaching the Scrap Yard and with another nearby Taliban team armed with an RPG on its immediate flank, proceeded to obliterate the insurgents. A roll of another "1" by Dead1 generated the "IED Contact!!" Fog of War card, which injured the Heavy Mortar loader (must have accidentally dropped a shell!).


The Taliban spotter took the initiative to relocate in the Spotter's Building while the Taliban team in the woods advanced to the edge of it. Their RPG failed to hit ASLAV 2.

The two Taliban teams in the woods advanced towards the enemy.
Three Taliban insurgents with a RPK machine gun arrived at Hot 5, near the heavy mortar team.


TURN 3 - THE ADVANCE CONTINUES
At the start of the Turn, we rolled to see what happened to the casualties. The Australian trooper dusted himself off and was back on his feet!
The downed mortar loader also found all his body parts intact.

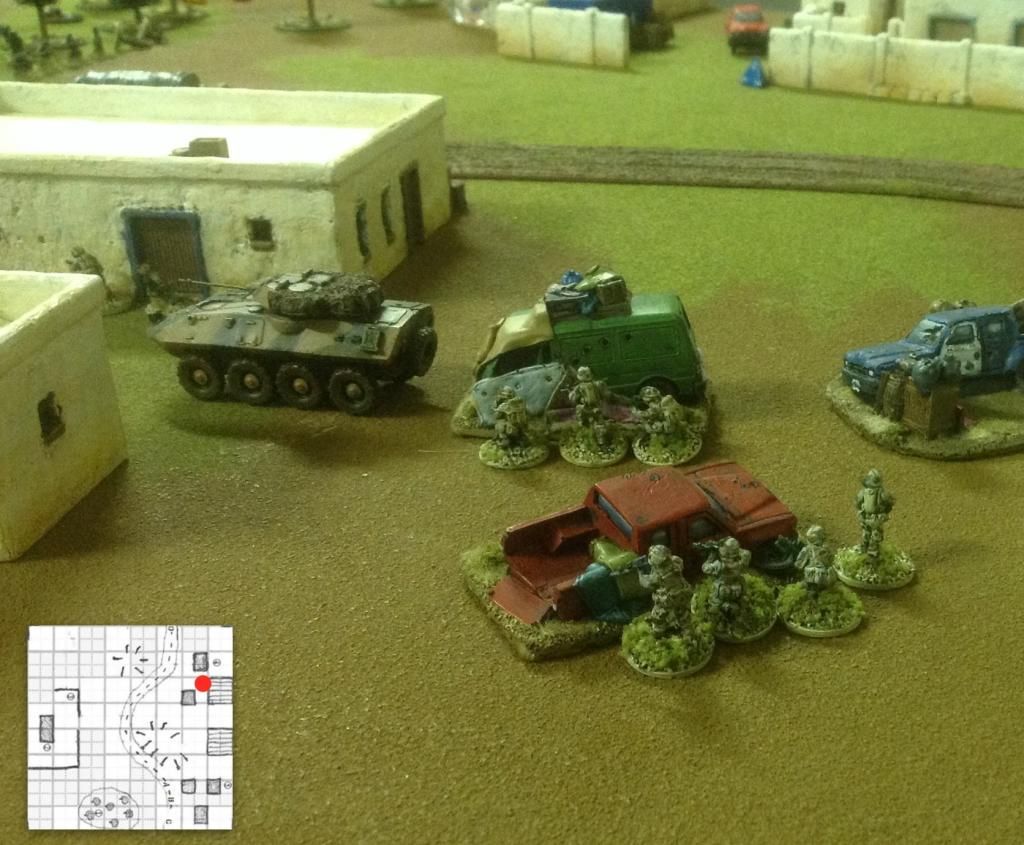
Despite the sudden loss of their second vehicle, the Australians were driven to get through the village but took a detour. In order to limit incoming fire from the Taliban, they would advance off the road via the Scrap Yard and nearby hovels.

The remaining ASLAV turned a number of Taliban by the woods into red mist and pinned them. It then gunned its engine and sped through the Scrap Yard.
The two fire teams, one supported by the NCO, engaged and neutralised the remaining Taliban in the Compound and then made their way through the Scrap Yard.
Meanwhile the crew from the ASLAV rushed forward and tried to locate the spotter but failed.

A paltry reinforcement of three Taliban arrived from the Compound and although barely a team, they did have a RPG.


TURN 4 - WHERE ARE YOU GOING?
Of particular note, the RPG casualty at the Compound got back to hit feet without a scratch.

Australians continued to hold the initiative but with troops on foot it would be a slow advance to pass through the village.

With the threat of heavy mortars, the two crew members from the brewed up ASLAV  advanced at point blank range of the Spotter. The small three man Taliban team by Hot Spot 5 reacted to try protect their friend but were too slow. The Spotter also wasn't quick enough to call in a mortar strike and the Australian crew spotted and then peppered him. The Taliban team then opened fire but without effect.

The Fire Team led by the NCO rushed over to the cover by the hovel near the jingle truck but had no targets to engage.

The ASLAV also advanced near the NCO team and engaged the smaller team of Taliban by the woods, who were all torn apart.


Having seen their comrades shredded, the larger Taliban team by the woods advanced into the Spotter's Building and engaged the ASLAV crew. The Australian's reactive fire downed two of insurgents but the following return saw one of the crew fall to the ground with a serious injury.

The rearmost Fire Team then broke into the small hovel and hosed the lone RPG gunner by the Compound, knocking him back down. However the Opposed Reaction Test saw Dead1 draw another Fog of War card, being "Where Are You Going?", whereby the player chooses an opponent's asset to roll on a specific table. Deaf1 picked the remaining ASLAV but thankfully for the Australians the result was to stick around for one more turn and then roll gain.

The Bushmaster's crew disembarked and took the corner of the Jingle Truck hovel.

Four Taliban arrived in the woods.


TURN 5 - CONSOLIDATION
The annoying Taliban with the RPG in the Compound got up yet again!

With the ASLAV about to leave any minute, its Fire Teams disembarked and entered the building by the Jingle Truck. They engaged the Taliban in the spotters building and downed them all. The Bushmaster crew then rushed the building to ensure none of these Taliban would get back up, but the small three man Taliban team with a RPK by Hot Spot 5 engaged them with reactive fire. The crew were slow and received a Fog of War card which "Caught Napping" the Mortar Team.
Although one of the Taliban was killed in the firefight, the RPK managed to cause a serious injury to a crew member. Enraged, the other crew member completed his task and mercilessly ended the wounded Taliban in the Spotter's Building.


The Fire Team in the small hovel finally killed the Stubborn Taliban in the Compound and then proceeded towards the hovel by the Mortar Team. Meanwhile the ASLAV engaged the Mortar Team but a pitiful display saw no casualties incurred. The vehicle did however decide to stick around for yet another turn.

The Taliban in the woods made their way through it whilst a lone Taliban arrived at Hot Spot 4.


TURN 6 - SPORADIC FIRE
The Australian crew members loaded up their buddies into the ASLAV. The ASLAV engaged the mortar team but after their nap these insurgents were quick enough to abandon their weapon and seek shelter behind the nearby hovel.

The Fire Teams in the hovel by the Jingle Truck engaged the remaining units near the woods and Compound and destroyed all but a single gun man. However during this firefight the NCO was killed!

The ASLAV also decided to leave the battlefield to his new mission.


TURN 7 & 8 - BUNKER DOWN
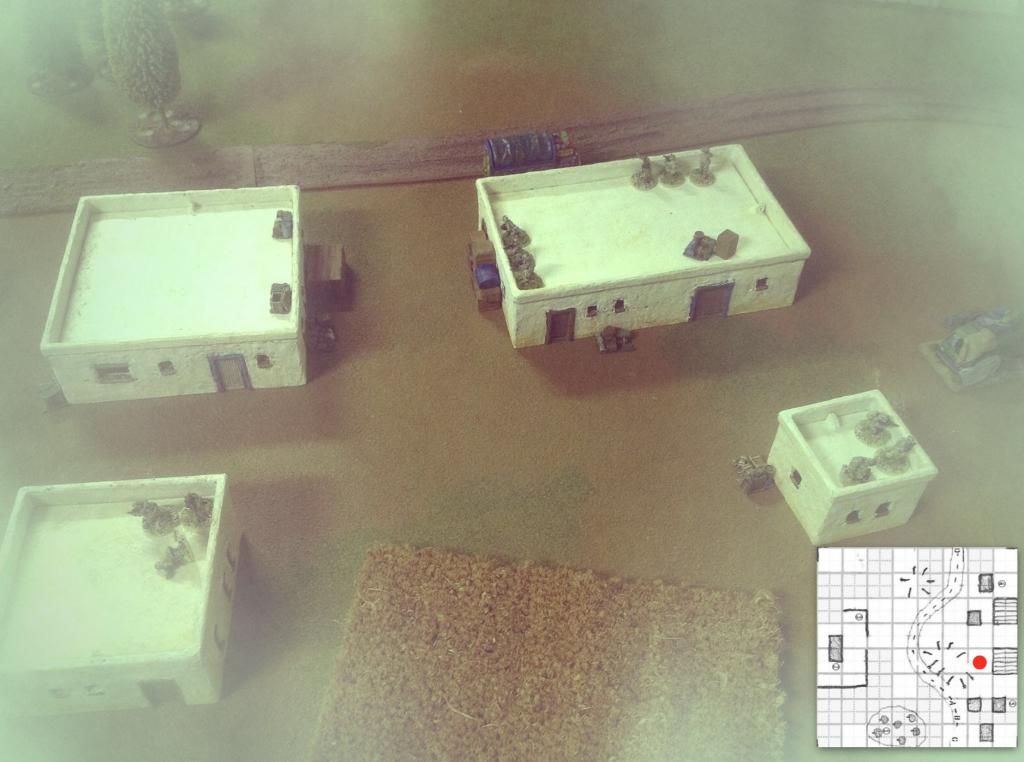
The final few turns saw the Australians form a perimeter and hunker down. A sandstorm suddenly swept across the area reducing field of vision. Despite this the Australians managed to finish most the Taliban in the village, although the Fire Team engaging the mortar crew and RPK team suffered a casualty, being a serious wound.


By the end of the game, the Australians had Destroyed seven Taliban teams and left no casualties behind, thus earning a total of 10 Victory Points.
Taliban destroyed two vehicles, caused three serious wounds and two kills, earning a total of 15, securing a small victory!


POST GAME THOUGHTS BY CAILUS
Although a loss, my Australians fared much better than Dead1's performance in the previous game, being a 6-26 loss!

The Fog of War Cards brutalised the Australians, especially that the first one gave a free kill to the Taliban, ensuring that the rest of the game would be dramatic. That the second ASLAV was also mitigated by a Fog of War card was the Taliban's icing on the cake.

Despite this, it was a very memorable game and that is what Force on Force is all about.


CORRECTIONS
Unfortunately I wrote this AAR a month after the actual battle. I can't account for the second Australian that died but it did happen somewhere!

Also, the map is meant to be played on either a 3x3 or 4x4 board, but we played on a 6x4, making it harder for the Australians to reach the exit point unless all vehicles survive and they mostly rapid advance.
Dead1 did forget to field his DsHK MG as well!


Thanks for reading. Appreciate your feedback, good or bad!

Cailus.


Friday, 19 December 2014

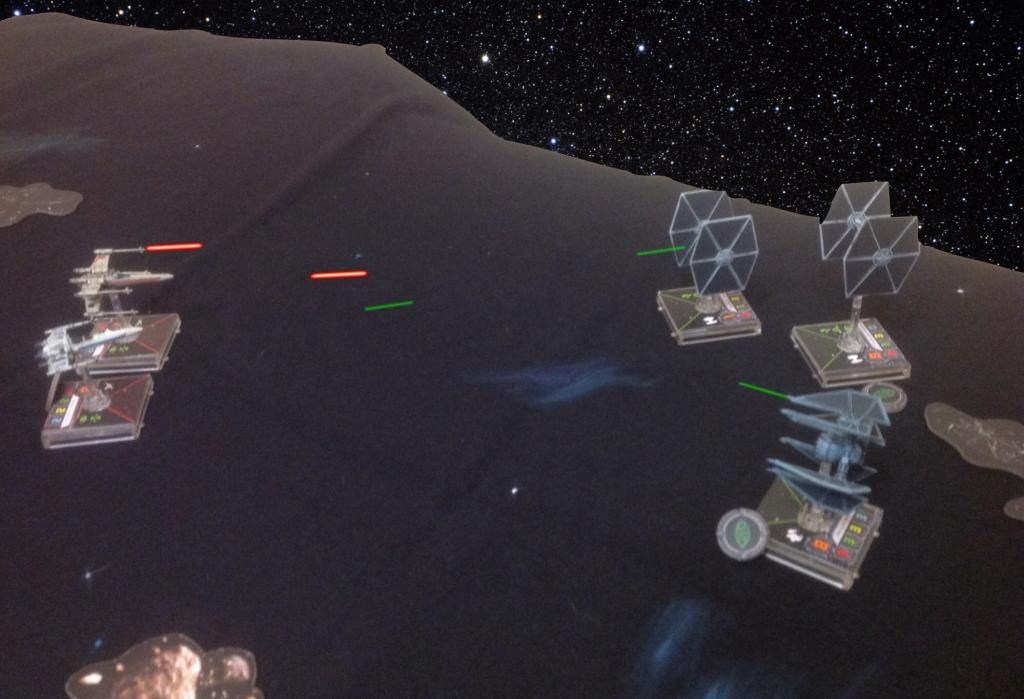
X-Wing - Wave 5 Test Drive AAR


Fantasy Flight Games hit the gold mine when they first released the X-Wing game a few years ago, starting with your classic TIE Fighters, Interceptors, Y-Wings and of course X-Wings. Through time they released more classic models in waves, such as the YT-1300 (Millennium Falcon), the Firespray (Slave) and more. However with the last few waves, we're seeing ships never shown in the original movies but taken from the novels and games. Not that I mind - there have been some very interesting ships like the elusive TIE Phantom and the great all-rounder E-Wing.

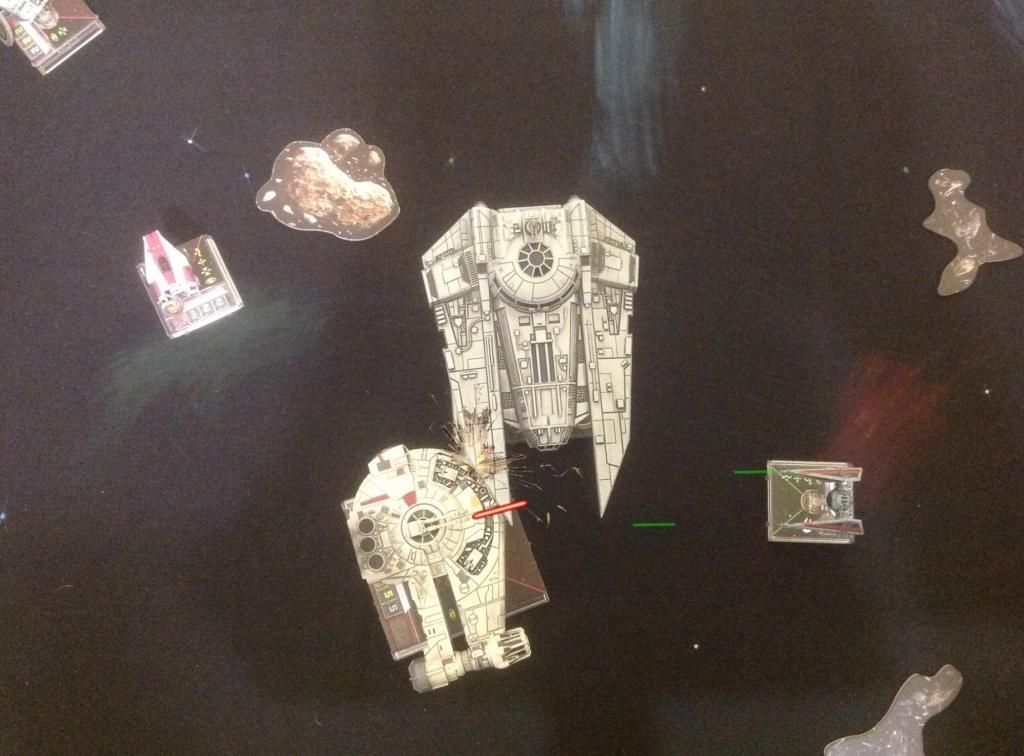
Recently Wave 5 was released, consisting of the YT2400 and VT49 Decimator.

Never heard of them? The Decimator is a big gun ship, akin to the Millennium Falcon. Where FFG got this ship was somewhat obscure - the ship first appeared in a MMORPG in 2004, "Star Wars: Galaxies" and then again in the Sony PSP/Nintendo DS game called Star Wars: Lethal Alliance (2006). It's not really found anywhere else!

Meanwhile the YT-2400, a lighter version of the YT-1300, was first found in the Stephen Perry's 1996 novel "Shadows of the Empire". The ship was later seen in various books and games, including the excellent Clone Wars animated series and The Force computer games.

So how do these ships act in the X-Wing game? I organised a151 point pitched  game with my younger brother (Spousal Crab) to test these ships out. I took command of the Rebels, leaving in the Imperials in the less experienced hands of Spousal Crab.

Copyright FFG/LFL

THE DECIMATOR
The Decimator is the first Imperial Ship with 360 degree firing arc, zero agility but lots of shields and hull points. Its got a respectable firing rate of three dice and interestingly, three crew slots. The most evident build that FFG make plain to see is that this ship is to bump into enemy ships on purpose and cause havoc. Here is the ship list I built:
  • Decimator Captain Oicunn, pilot skill 4, 53 points in total.
  • Mara Jade (crew) - makes enemy ships stressed with range 1 at the end of the Combat Phase.
  • Navigator (crew) - taken from another expansion, allowing the changing of speed.
  • Moff Jerjerrod (crew) - can make the Decimator's crew die instead if taking Face Up Critical Damage.
  • Intimidation (skill) - enemy ship in base to base contact lose agility.
  • Tactical Jammer (modification) - the Decimator counts as an obstruction similar to an asteroid when it comes to shooting.

Captain Oicunn's special ability is when he bumps into any enemy models, they take 1 damage!


YT-2400
This ship has less hit points than its bigger brother (unless you're taking the most basic YT1300) and a decent agility of two dice. Its rate of fire is a measly two however you can attach cannons for a very decent punch. It also has space for two crew. Here's what Spousal Crab will be testing out:
  • Dash Rendar, pilot skill 7, 53 points in total.
  • Heavy Laser (cannons) - four fire dice at range 2 to 3.
  • Outrider (title) - the secondary weapon has 360 degree firing arc!
  • Lando Calrissian (crew) - roll two green dice and gain whatever you roll.
  • Lone Wolf (skill)  - re-roll a blank die when attacking and defending, as long as there are no friendly ships nearby.

The one problem with this build is that as the ship cannot fire primary weapons due to the Outrider title and the Heavy Laser Cannons shoot between ranges 2 and 3, the ship cannot shoot at anything at range 1!


SET UP
I couldn't be bothered shifting the table in order to deploy across the traditional long table edges so we instead deployed our forces in opposite corners (range 3 boxes). With only a handful of ships aside, this deployment isn't actually bad and gives a few more turns to manoeuvre.


FIRST BLOOD
The first couple of turns saw the Rebels split, with Jek Porkins and Airen Cracken fly side by side on one flank, Tycho in the middle and Dash on the other flank.

The Imperials moved towards the centre in a loose formation, although the two TIE Fighters were hugging the flank in the hope of circling around X-Wing and Headhunter.

As the turns proceeded the battle would be split in half: Dash's YT-2400 against Oicunn's Decimator and Terran Cowall, while Jek, Cracken and Tycho went up against the remaining assortment of TIEs.

The first round of fire was between the big ships - Dash managed to strip all of the Decimator's shields in a single round of shooting!

The first blood also went to Rebels as Jek and Cracken, with luck of a Direct Hit critical, blasted apart the Academy TIE Fighter.


THE TURN AROUND
Although the initial turns found the Rebels holding the advantage, the Imperials soon began taking the good guys apart.
The Rebels threw everything in an attempt to destroy Reiker Brath's formidable TIE Defender but he held on with a single hull point. 
Terran Cowall turned his attention to help out the other TIE's and in a concentrated effort destroyed Cracken in his Headhunter.

Meanwhile the Decimator started to chase the YT-2400, continually bumping into it and causing damage and sometimes stress thanks to Mara Jade's ability. Dash's YT-2400 struggled to find a place without having to lose actions but dodged some of the incoming fire and blasted chunks out of the Decimator. However whenever it was too close, it had to instead shoot at the TIE's. The Rebel ship also had a few turns were, thanks to the placement of the Decimator, could not move at all!

The Imperial star fighters eventually surrounded Jek. The X-Wing had a final chance to destroy the already damaged TIE Defender but failed dismally. In a screaming fit, Jek was obliterated, leaving the a Rebels with an yet to be damaged A-Wing and the beat up YT-2400.


A HERO IS REVEALED
The brutal bouts of fire between the Decimator and YT-2400 ultimately ended. The YT-2400 finally succumbed through a battle of attrition, whilst the Decimator stood triumphant albeit with two hull points left. It then turned its attention to the lone survivor, Tycho in his nimble A-Wing.

Through some fine flying, Tycho boosted to point blank range and using his Outmanoeuvre skill, finally defeated the TIE Defender. The remaining Interceptor and Holwlrunner struggled to get a bead on the A-Wing for the moment.
The exasperated TIEs continued to try and find a way to shoot the A-Wing whilst Tycho in return managed to damage the Interceptor.

Within the Decimator, Oicunn debated with the Navigator on how to move as the nearby debris cloud could cause an issue. They decided for a very conservative approach and their choice landed them a fair distance away from the debris. A little bit more of speed would have seen the Decimator in a safe position that would have also forced the A-Wing into the debris and limit its effectiveness to fire.
However there was now plenty of space for the A-Wing to safely navigate around the debris. At point blank range, Tycho destroyed the Decimator.


A GAME OF MOUSE & MOUSE
The remaining three fighters circled around one another, trying to get the advantage. The Interceptor managed to strip a single shield off the A-Wing but then after performing a K-turn landed in debris. Although evading further damage, it left the Interceptor with two Stress tokens.
But it was not to matter anymore. Daring flying by Tycho put him in a prime position to possibly end the Interceptor. Tycho sacrificed his focus in order to boost forward into a prime position. Howlrunner was unable to protect his team mate and the A-Wing's three shots turned the Interceptor into a ball of flame.


It was now all between Howlrunner and Tycho, two nimble fighters with the same number of attacks and agility. Although Howlrunner shot first every time , Tycho had the ability to be stressed but still take actions and the Outmanoeuvre skill.

The turns that followed saw a respectable dog fight that slowly wore down both fighters. In the last few turns both ships had but a single hull point left.  Eventually Tycho's abilities finally put Howlrunner in a dangerous position, being flanked and point blank.With three attacks and Howlrunner being reduced to two agility, it was game over when all of Tycho's hits landed.

The Rebels just scraped in a Victory!


A CLOSE GAME
At one hull point each and similiar ships, you cannot get closer than that. I was extremely surprised to see a A-Wing do this - take on four ships and survive!

The Imperials did a great job mid game resulting in the destruction of Cracken, Jek and Dash. Somehow with a mix of bad luck and bad positioning, the Imperials somehow lost most of their ships! The last battle between Howlrunner and Tycho was an attrition of will and skill.

Unfortunately, the Wave 5 ships didn't get to shine as much as I hoped. They were so busy blasting at one another tit-for-tat. 

Spousal Crab did a great job of ensuring the Decimator kept smashing into the YT-2400. In future, I would give the Decimator the "Dauntless" title, giving it the ability to perform actions even if it overlaps another ship. With "Mara Jade" and the "Intimidation" skill, you want to see the Decimator bludgeon into as many Rebel fighters as possible. I would also maybe swap the "Navigator" out for the "Tactician", which would ensure more Rebels find themselves stressed. The "Tactical Jammer" I am not so sure about, although it sounds good on paper it would probably be better suited to a Decimator with a higher pilot skill.

The YT-2400 is an interesting ship and not just a smaller version of the YT1300. It's the only ship that can fire its cannons 360 degrees, it can barrel roll, has decent manoeuvrability and promotes a lone wolf play style. 
"Lando Calrissian" (crew card) deserves special mention - he can potentially give two Evade tokens (or two Focus or a combination of both) even if the ship doesn't have those abilities! There is the potential to get nothing but statistically you'll get one benefit more often than not.

If you haven't already got them, both ships are worthwhile adding to your collection. There are a few cards I have not mentioned that may find regular use.
The Decimator provides "Fleet Commander" (Imperial only - give two other ships within grange 2 Focus and then get stressed) and "Ruthlessness" (if an attack hits, you must damage any other ship within range 1 of the target, even if it is on your side. Great swarm killer).
Meanwhile the YT-2400 provides "Dash Rendar" as a crew card if you want to make another ship be able to fire even if it is on an obstacle. The crew card "Leebo" gives you a Boost action at only 2 points (instead of buying a Engine Upgrade at 4 points) but your ship receives one Ion token if you do boost.

Thanks for reading!

- Cailus


References:
http://starwars.wikia.com
www.fantasyflightgames.com

Thursday, 27 November 2014

Who Relieves the Relief - A Force on Force After Action Report


With Dead1 recently having painted up the ASLAVS (Australian Light Armoured Vehicle), we looked to find a mission where we could include them.
Fortunately, the "Who Relieves the Relief?" mission from Donogh McCarthy's Defence of Wilson's Wadi ticked all the boxes, only having to replace the Brits with Australian type forces.

The mission saw two infantry fighting vehicles (IFV) and a truck fighting their way through a village in order to prove support to friendlies. However the truck hits a IED and the action goes from there.

With Dead1 being the commander of the Aussies (rated D8/D10 and well supplied), I set up my Taliban Groups around (rated a D6/D8). For the random asset I received heavy mortars and not having used such things before, I wasn't sure how they'd fare.


2 SEPTEMBER 2008 - UNEXPECTED CONTACT
A small element of Australian troops were tasked with providing relief to embattled soldiers at Khaz Oruzgan. Their path would take them through the small village a few kilometres away, where there were no reports of Taliban presence.

The Bushmaster truck was escorted by two ASLAV fighting vehicles laden with fire teams and their commander.

Although they entered the village with caution, the Bushmaster triggered a mine on the road. Despite the violent blast, the vehicle and its crew were fine. Soldiers reported suspicious movements around the village buildings on both sides. With the urgency of their support needed by units ahead of this village, the Australian commander gave the order to push through.

Mission map from the Scenario

The unit enters the village

Taliban prepare to attack the Australian troops

Heavy Mortars deployed by the Taliban

TURN 1 - AMBUSH!
ASLAV 1 provided covering fire as the Bushmaster and ASLAV 2 proceeded forwarded, reaching the position by the civilian jingle truck. The advancing units peppered the nearby targets which returned fire, with ASLAV 1 doing a poor job of overwatch. Where the mine failed, small arms fire by the Taliban disabled the Bushmaster. The two crew held their nerve and remained in the vehicle for the moment.

Soldiers reported an amassing of more troops by within the woods ahead of them.

The Australians advance and engage the Taliban

The Bushmaster is disabled!

More Taliban arrive by from the woods.

TURNS 2 & 3 - AT A SNAIL'S PACE
The Australians remained in control of the tempo for the time being. Reaction fire from the Taliban failed to further damage the Bushmaster and their RPG's failed to dent the ASLAVS.
The crew from the disabled Bushmaster made a break for ASLAV 2. Fortunately they embarked the vehicle before the flanking Taliban group had a chance to fire. The cell was engaged by ASLAV 1 and took heavy casualties but held their resolve. RPG fire from the cells either missed or ricocheted off the armour harmlessly.
However the Australians had failed to shift their positions for the last two turns and more Taliban were arriving.

The crew disembark and head for ASLAV 2

The ASLAV's gun rips apart the enemy.

TURN 4 - A STALLED ADVANCE
Having stalled their advance, the Australians lost the initiative to the Taliban. The groups in the forest made a dash and broke cover. The Australians reacted and the fire all but wiped out two cells, however concentrating their fire meant that the convoy would not be moving just yet. Two RPGs flew at the Aslav but these bounced off the armour.

Further Taliban reinforcements arrived, whilst the Dshk gun positioned itself in the nearby courtyard in preparation for defilade fire. The heavy mortar spotter made his way into a village building that looked down the road.

The Dshk gun positions itself to flank the passing armour

Two groups of Taliban are decimated as they exit the woods

TURN 5 - MORTAR RAIN
The Taliban started to turn up the heat. Mortar rounds rained on the convoy and the ASLAV 2's track drive was damaged, reducing its mobility. ASLAV 2 struggled forward and parked itself next to the jingle truck, while the other Fighting Vehicle provided reactive fire, which nearly destroyed one of the flanking cells.

A small cell rushed up near the spotter's building whilst the Taliban by the woods rallied into one large mob.
The heavy mortars engage the Aussies

TURN 6 - DISASTER!
The Taliban retained the initiative but the cells bided their time. ASLAV 1 bounded past the other vehicle when the Dshk opened fire. It turned out that the crew were better trained that the other militants and their fire was effective, damaging the armoured vehicle's turret. RPG fire from the two decimated cells proved ineffective.

Heavy mortar fire was unavailable this turn however cell by the woods had an RPG and with a very lucky shot, the Aslav 2 was knocked out. The squished in Australians consisting of the Bushmaster crew, the ASLAV crew, the fire team and commander quickly bailed out and checked their casualties.
The only fortune for the Australians was that there were no reinforcements for the Taliban, at least for the moment.

Disaster strikes

Emergency disembarkation by the troops and crew


TURNS 7 & 8 - BELEAGUERED
The Australians deployed in a circle around the destroyed ASLAV and found that two of the soldiers were dead and one seriously wounded. The remaining ASLAV concentrated on the Dshk team and its crew was eliminated. The remaining firepower of the Australians was scattered but managed to finally destroy one of the  cells with a RPG and the spotter from the mortar team was killed.

Further fire from the remaining Taliban locals raked through the beleaguered Australians and they took heavy casualties.
Ultimately another four Australians would perish and another was seriously wounded.

A handful of Taliban continue to fight on despite numerous casualties

Things are looking grim for the Australian soldiers

THE RELIEF FAILS
With heavy casualties and unable to push through the village, the Australian relief force had to retreat, leaving two knocked out vehicles, two seriously wounded and six dead.
The Taliban had taken a large number of casualties but not even close to make a real difference.

AUSTRALIAN ARMY: 6 Victory Points
TALIBAN: 26 Victory Points


THOUGHTS BY CAILUS
My plan from the get go was to stall the convoy using any means. However it did not start well with the free IED hitting the bushmaster doing absolutely nothing, despite the impressive stats that could have lifted the Aslavs of the ground!
I threw a few teams into the fray knowing I would lose them (see Turn 4) but as Dead1 opened fire with glee I smiled in return as he continued to fail his Reaction Tests, meaning he lost his ability to move.
Actually, the Reaction Tests went mostly my way, despite the Australian superiority, mostly die to Dead1 inability to roll decent results. However it wasn't all luck - I think Dead1 didn't utilise his firepower or speed to great effect. Reacting less and waiting to do Move & Fire Orders might have been the way to go.
The heavy mortars went well and that lucky RPG shot really helped too!

We'll be organising a rematch soon with Dead1 and I swapping control over the forces. No doubt it will be as action packed as this one.